
Tuesday, February 10, 2015

Tuesday, January 6, 2015
Simply Chocolate Truffles
The Christmas tree is gone, the decorations are all stored away for another 11 months and now it is back to reality and routines, right? Not so fast. Before you rush back into your daily to-do's, you must take a minute to make these chocolate truffles. No sharing with the kids, friends, or co-workers.
Yes, they would have made the perfect little hostess gift for all those holiday parties, but there is a reason why I waited until now to post this recipe. You have worked hard wrapping, shopping, hosting and cooking all holiday season and so you deserve these truffles. Trust me.

Before my daughter was born, I had a catering business here in Los Angeles and these truffles were my most requested dessert. I know that chocolate has a reputation for being difficult to work with. A ganache that's too runny, chocolate that won't harden properly and those unsightly white streaks!

All will be well if you know a few things beforehand. Melting your chocolate takes patience. No rushing. Always melt it in a separate bowl placed over a pan of gently steaming water. Never let the water get too hot or touch the bottom of your bowl. This will result in scorching the chocolate and a bitter unappealing taste. Also, use the very best chocolate that you can find. I like to use semi-sweet with a 61% cocoa content. This makes the truffles intensely flavored without too much sweetness. Most chocolate brands will be available in small wafers that melt quickly and evenly.

Though decadently rich and silky, these truffles are deceptively easy to make and require only a few basic kitchen tools. A double boiler, wisk, small 1 inch scoop (or your hands!) and a sheet pan are all you will need.
The rest is easy, a little messy and very delicious.
Chocolate Truffles
Ganache Centers
16 oz. semi-sweet chocolate
16 oz. (2 cups) heavy cream
Chocolate coating
16 oz. semi-sweet chocolate
Place 16 ounces of chocolate and equal parts cream in the top of a double boiler, make sure the bottom of the bowl does not touch the water, and melt over low heat. As I mentioned earlier, I like semi-sweet chocolate for my truffles but if you prefer a darker chocolate, feel free to substitute that in place of the semi-sweet. Stir occasionally until the ganache mixture is melted and takes on a glossy sheen. Remove from heat and allow to cool in the refrigerator for 2-3 hours. The mixture will become thicker as it cools.
Removed cooled ganache from the refrigerator. Use your 1 inch scoop, or a spoon, to scoop out a 1 inch ball of the ganache. Here is the messy part. Lightly and quickly, use the palm of your hands to roll the ganache into balls. If you tend to have warmer hands, they will melt slightly. If you work quickly and try to handle them as little as possible they can be coaxed into taking on a round shape. It takes a few tries to get the hang if it. Once you have a tray rolled out, place it in the refrigerator to chill before the next step. Meanwhile prepare your coating.
Using the same method as above, melt 8 of the remaining 16 ounces of chocolate in the top of a double boiler on low heat. In order for the coating to harden and form a hard shell around your ganache you will need to temper the chocolate. I have a simple method for doing this but if you would like the more technical aspects of tempering David Leibovitz does a beautiful job explaining the chemistry behind it along with several good techniques to try.
Once your chocolate has melted, remove the pan from the heat and stir in the remaining 8 ounces of chocolate. Keep stirring. The additional chocolate will melt as your stir, cooling the chocolate and ensuring that it will be tempered.
When all the chocolate had melted it is just a matter of dipping each ganache center into the chocolate and allowing it to harden. If it is warm in the kitchen I like to place my truffles into the refrigerator for about 30 minutes to help them along. After this, they can be stored in a cool place at room temperature or in the refrigerator.

I am a purist when it comes to my chocolate but you may like to experiment by adding flavors to your ganache. Hazelnut (Frangelico), coffee (Kahlua), raspberry (Chambord) or cherry (Kirsch) are all good options. If you master the truffle technique and want to experiment, consider skipping the tempered coating and rolling your ganache centers directly in a dark cocoa powder...an equally decadent treat.

Monday, December 8, 2014
A Very Merry Sale at Amuse Me Shop

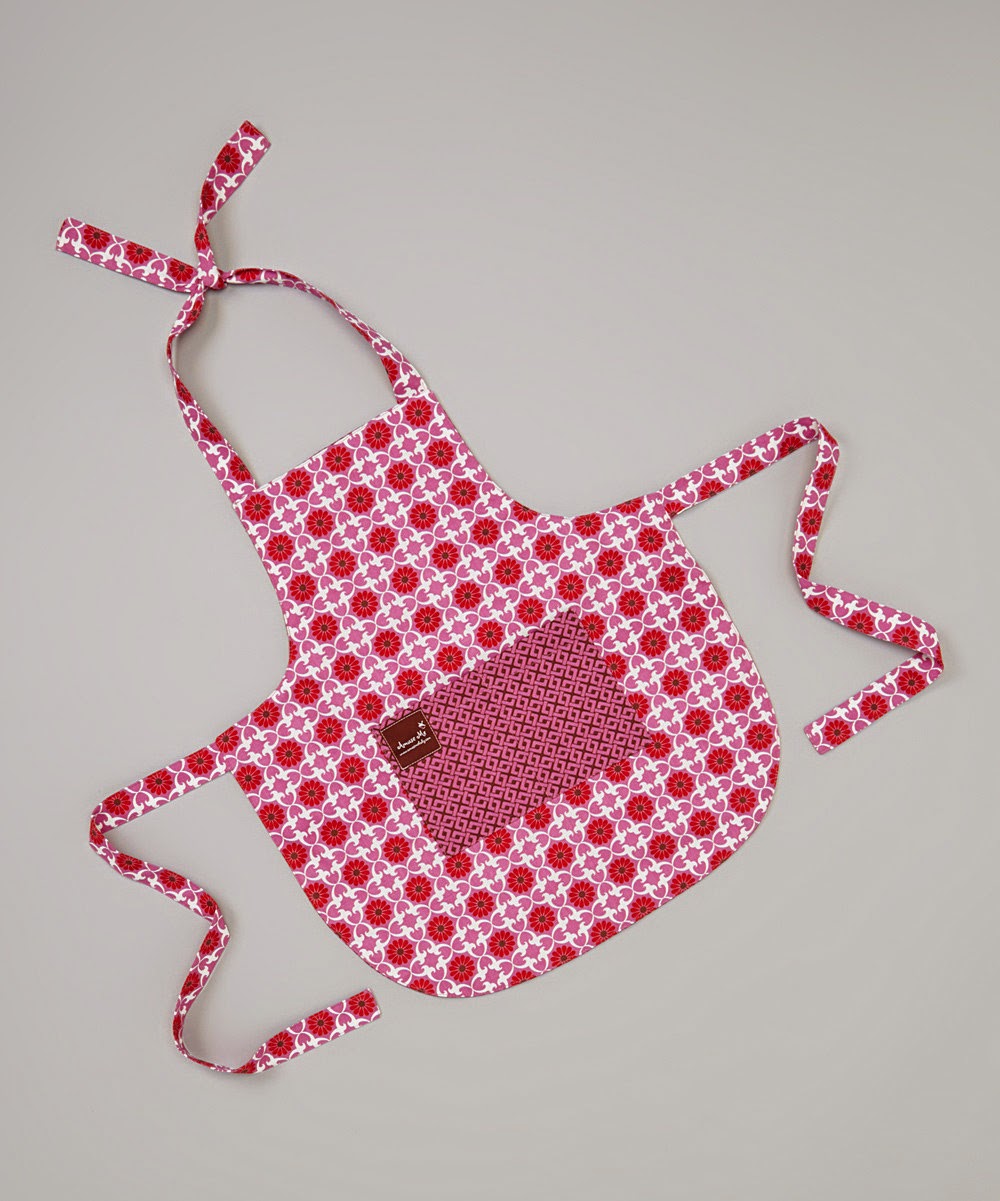
It is a very Merry Christmas indeed with 30% off of ALL items in the shop until December 14, 2014. Let us help you check some items off of your list. Reversible aprons make excellent gifts for the girlfriends in your life and matching ones are available for the tots. Be sure to check out our new line of kangaroo pocket tank tops and pants for girls while you are there. The always classic Austen Dress is also available in many colors, including red for the holidays. Happy Shopping!
etsy.com/shop/AmuseMeShop Use code VERYMERRY
Monday, November 3, 2014
Angler Fish Costume for Halloween

I had hoped to post this for you before the holiday, just in case any of you were thinking of taking on your own fishy project. However, I was sewing and primping this lovely bioluminescent specimen right up until the moment we went out the door.

Six weeks ago when my 8 year-old decided to be a deep sea Angler Fish for Halloween, I said heck-yeah let's do this! Two weeks in, countless bent needles and two jammed sewing machines later, I was beginning to doubt my own sanity. I kept moving on it and soon found myself really excited about the progress I was making. Slowly our fish came to life and once we saw it lit up at night...

let's just say it was a proud moment.

Here is a little bit about how I put it together.
I found an out of print Simplicity pattern for a child's fish costume on eBay. This was the base for the body and shape of the fish. I wanted it to look less goldfish and more like a predator so I sketched new patterns for the tail, dorsal fin and side lateral fins. I detailed these with black vinyl to get the feeling of bony spikes. I also used vinyl on the lips and crafted individual teeth out of foam and felt. These were sewn on at odd angles with longer ones in the center and along the lower jaw.


Notice that I am now referring to the fish as 'him'. We have become somewhat attached.
Monday, October 20, 2014
A Deliciously Simple Jam Crostata for Fall

Summer overstayed its welcome this year. It just wouldn't end. Even now, as the cool undertones in the breeze whisper "fall", summer is struggling to stay just.. a.. little.. bit.. longer. This is why I had to buy the dozens of late summer yellow peaches. It simply just hit me, when I saw the pears and apples crowding the market stalls, that summer would eventually loosen her grip and I'd have to wait another year to make my jam. So you see, I had to buy the peaches.
Luckily I found a good use for my pantry of jam (my jamtry if you will...) You can use a combination of flours for the crostata crust. It is delicious with a traditional buttery all-purpose flour crust. I like addition of almond flour, the crumbly texture balances out the the chewy jam. If you find the crust too sweet for your taste, try using a more acidic jam or marmalade. The Blue Chair Jam always balance out their fruit recipes with a good amount of acid so for me, the peach jam was delicious and not too sweet.
 |
| End-of-Summer Yellow Peach Jam//recipe from Blue Chair Jam Cookbook |
Now for the recipe-
Jam Crostata for Fall
2 cups all purpose flour
1 cup almond flour
3/4 cup cane sugar
1/2 tsp. baking powder
Small pinch of sea salt
3/4 cup unsalted butter
3 eggs, separated (save the whites for later use)
12 ounces of jam or marmalade
- Preheat oven to 375 degrees and butter a 10 inch tart pan. I used a slightly smaller 8 inch tart pan for this recipe because I like a thicker crust and having extra crumble topping to use for other desserts later in the week. If you prefer yours to be thinner, use the larger pan.
- In a food processor pulse together flour, sugar, baking powder, salt and butter until the mixture is crumbly and resembles soft sand. Add the three egg yolks and pulse until mixture just begins to hold together. Press 3/4 of dough mixture into your tart pan. Reserve the remaining mixture. This is your crumble topping. There is no need to blind bake the crust first.
- Spread your jam of choice over the dough. Be sure to go all the way to the sides. The parts touching the pan turn out chewy and good!
- Sprinkle the remaining crumble mixture on the top and bake for 30-40 minutes.
 |
| Crostata Crust//photography by Amuse Me |
 |
| Jam Crostata//photography by Amuse Me |
Wednesday, October 1, 2014
Welcome Fall, Another Sale
We are excited to welcome Fall with 35% off all of our Adult and Children's reversible Apron styles.
Children's Aprons, originally $45.00 are now $35.50 and Adult Aprons, originally $65.00 are now on sale for $45.50. As always we offer $6 flat rate USPS shipping on all orders.
Happy shopping and let's get cooking!

Children's Aprons, originally $45.00 are now $35.50 and Adult Aprons, originally $65.00 are now on sale for $45.50. As always we offer $6 flat rate USPS shipping on all orders.
Happy shopping and let's get cooking!
Saturday, September 27, 2014

Monday, September 22, 2014
Flash Sale happening now at Amuse Me Shop
Exciting things are happening in the shop this month. We are clearing the decks to make room for our new Fall Basics Collection. This means that all of our cheerful pantaloons need to find good homes. Shop all styles and sizes now for 50% off through October 1, 2014. Click here to visit the shop or click on the image below.

Saturday, August 2, 2014

Monday, June 16, 2014
Waterfall Bagging in Oregon

It has been said that the road trip is a right of American passage. For some it is the thrill of endless possibility, the rush of the open road and a pervasive sense of freedom. For others it is literally Hell on wheels. Visions of being cramped in a car, with endless miles of road, each more or less indistinguishable from one another, took me back to the days of driving across the country with my family. We would drive for hours on end without stopping. Bathroom breaks and were frowned upon and McDonalds was mandatory. With this in mind, I hoped that this trip might just heal my childhood cross-country trauma.
As we traveled a definite theme emerged without any planning at all. We knew that Oregon was home to several fantastic waterfalls, after all we HAD done our research well. What we didn't realize was how addictive "waterfall bagging" can be. After a few days or driving around central Oregon we'd already bagged 7 beautifully photogenic falls and all we could think of was finding just one more. Just when we'd thought that we'd seen the most beautiful one, another would surpass it and we would have to amend our rating scale once again. By the end of the month (aided by a drive to "Waterfall Alley" near the Columbia Gorge) we'd bagged our 17th one.
Here are a few of our favorite ones. By the way, hiking to them made them that much more spectacular so some of our choices are most definitely influenced by the effort exerted to reach them.

Bridal Veil Falls on the Historic Columbia River Scenic Highway. An easy 1 mile round trip hike to this small but lush rainforest falls that empties into the Columbia River

Tokatee Falls is one of the most famous in Oregon and we agree that it is spectacular. 1 mile roundtrip. It was at the end of a very long day for us that started in Crater Lake, so we didn't take as long as we would have liked here.

The two-tired falls are fantastic but we were more excited by the two bowl shaped pools at the top of the basalt falls.

Elowah Falls was a hidden gem. We hiked a bit further to get to it but who cares when you are hiking through rainforest, lush with green and wildflowers booming all around you. The falls had a distinctly Hawaiian feel to them and were very peaceful.

Our Chow thought so too.

The last falls that I will share with you are Salt Creek falls in the Willamette National Forest. It is the second highest waterfall in Oregon and a great starting point from which to explore more falls.

Without question the best road trip yet...and not a McDonalds in sight.
Thursday, June 5, 2014
#Oregonorbust, Let the adventure begin
After the initial excitement of picking our spring family road trip destination cooled, we realized that Oregon, although much smaller than our own California was still an ENTIRE state and without family to stay with or knowing the area very well, we still needed to pick a town as our home base from which to explore.
After an attempt to do research on the internet and being inundated with information and destination reviews that held no context for me, I needed to get my bearings. I decided to take a less tech savvy approach. I went to the bookstore for a huge road atlas, an old school folding map (that I can finally fold properly) and some good guidebooks, the kind you can highlight, dog ear and stick general within reach items into to mark a must see attraction.
Books in hand, we read everything. Anything that even remotely interested us, we highlighted on our map. Lonely Planet Pacific Northwest's Best Trips gave us day trip ideas for the whole state and our Moon handbook for Oregon helped to fill in the planning details.
We decided early on that renting a house made the most sense for us. We would be there a month and a dog friendly home would gladly accommodate our furry traveling companions, but where to go? What if we chose somewhere far from the places we wanted to visit? We wanted to be remote but what if that meant we were 20 miles from a grocery store? We were about to be rewarded for our efforts though, our abundantly highlighted map would tell us tell us clearly where we needed to be. There at the epicenter of the neon pink ink, would be our answer. There was only one problem. We had two answers. It was very clear that we had a number of attractions on our wish list to see along the coast and an even great number in central Oregon.
So we did both, allocating three weeks to Central Oregon where we found a great house on the river in La Pine (near Bend) and a week in Florence on Mercer Lake. Our drive to our first destination in La Pine was a long one, so we found a third house in Jenner just north of San Francisco, to help break up the drive.

Houses booked, bags packed, bikes, paddle boards and animals loaded, with our now well work guidebooks and maps and Oregon playlist set to go, our adventure was ready to begin...

Tuesday, June 3, 2014
Oregon or bust
It all began about five months ago. My husband had mentioned, yet again, how much he'd like to explore the city of Bend in Oregon. Why? I'd asked him. "I'd like to check it out" he'd answered. That was it, his attempt to persuade me to join him on his Bend Bandwagon. Compelling as his sales pitch was, I began to consider the many reasons why visiting Oregon would be fun for us after all. Great food, lots of hiking trails, lakes and streams for fishing, and getting out of the city, all sounded great and Bend was nowhere on my list. So I said let's do it. Let's pack up our two dogs, the cat and our daughter and really experience somewhere new, while she is still small. Let's go on a month long road trip and get to know the locals. So we did.
If you have been following me on Twitter and Instagram #oregonorbust, for the past month then you know the rest of the story and how it all worked out for us. You've seen the photos of the beautiful waterfalls, mossy forest floors and the endless trails we explored. I plan to share more details with you in upcoming posts, our planning process, the guidebooks that you really need to buy and the ones you don't, which towns we fell in love with (yes, Bend is in there), delicious places to eat and a few to skip. It is my hope that you will enjoy the photos, stories and perhaps be inspired to plan your own adventure with your family this summer.

I also found some inspiration for Amuse Me and hope to have new items in the store for the summer.
To be continued...
If you have been following me on Twitter and Instagram #oregonorbust, for the past month then you know the rest of the story and how it all worked out for us. You've seen the photos of the beautiful waterfalls, mossy forest floors and the endless trails we explored. I plan to share more details with you in upcoming posts, our planning process, the guidebooks that you really need to buy and the ones you don't, which towns we fell in love with (yes, Bend is in there), delicious places to eat and a few to skip. It is my hope that you will enjoy the photos, stories and perhaps be inspired to plan your own adventure with your family this summer.
I also found some inspiration for Amuse Me and hope to have new items in the store for the summer.
To be continued...
Sunday, February 23, 2014
Vanilla-Scented Candied Orange Peel

I hope that you had a nice Valentine's Day, celebrating with someone that you love, your husband, a friend or the cat.
I have been meaning to make a version of these Candied Orange fruit peel slices from The Blue Chair Jam Cookbook, since the holidays! We were recently gifted a mound of the most delicious oranges and seeing how it was Valentine's Day weekend, it seemed like the perfect time to make them.
There are a number of citrus fruits to choose from in the markets now and they are all at their peak. I chose oranges but use what you have access to, Meyer Lemons, Limes, Buddha's Hand or Pomelo would also be delicious.

These candied peels are truly a labor of love and require a little patience and planning to get them just right. I started mine the night before, allowing them to cool in their liquid overnight and left them to dry for two days before coating them in the final dusting of sugar.
You will need:
4 oranges
2 vanilla bean pods
4 1/2 cups cane sugar
2 cups water
2 cups vanilla scented sugar for dredging
Cut each orange in half. Carefully squeeze the juice out of each half while keeping the rind whole. Save juice for another use. Place the halves in a nonreactive saucepan (David Lebovitz has a great post on this) and cover with water. Bring to boil then reduce to a simmer for 10 minutes. Drain and discard the water. The recipe recommends repeating this process once or twice more. I opted to do it once and they were delicious, even with a little natural bitterness, which I like.
Cover the halves once more with cold water and bring to a boil again. Cook at a simmer for about 60 minutes. Drain and allow the rinds to cool or allow to sit overnight uncovered to cool. When they are cool enough to handle, scoop out most of the white pith on the inside with a spoon, leaving a thin amount attached. Then slice each half into thin strips.

In a sauce pan, add your sugar and water and bring to a boil, stirring to dissolve the sugar. Split your vanilla bean pods and add the caviar inside them, to the sauce pan with your sliced fruit peel. Add the emptied pods to your 2 cups of sugar for dredging. Place the vanilla sugar in an airtight container and set aside.
Turn the heat down to a simmer and allow the slices to cook without stirring for about 30 minutes. You will know they are done when the pith turns translucent.

Allow the slices to cool in the syrup then remove them with a slotted spoon to a wire rack or set on top of parchment paper to dry. I set mine in the oven with the heat off and left them for two days to make sure all of the moisture had gone.


Now for the fun part. Remember the vanilla pod scented sugar that you set aside? Pout it into a bowl and, a handful at a time, add your slices gently sifting them through the sugar until all the peels are coated.
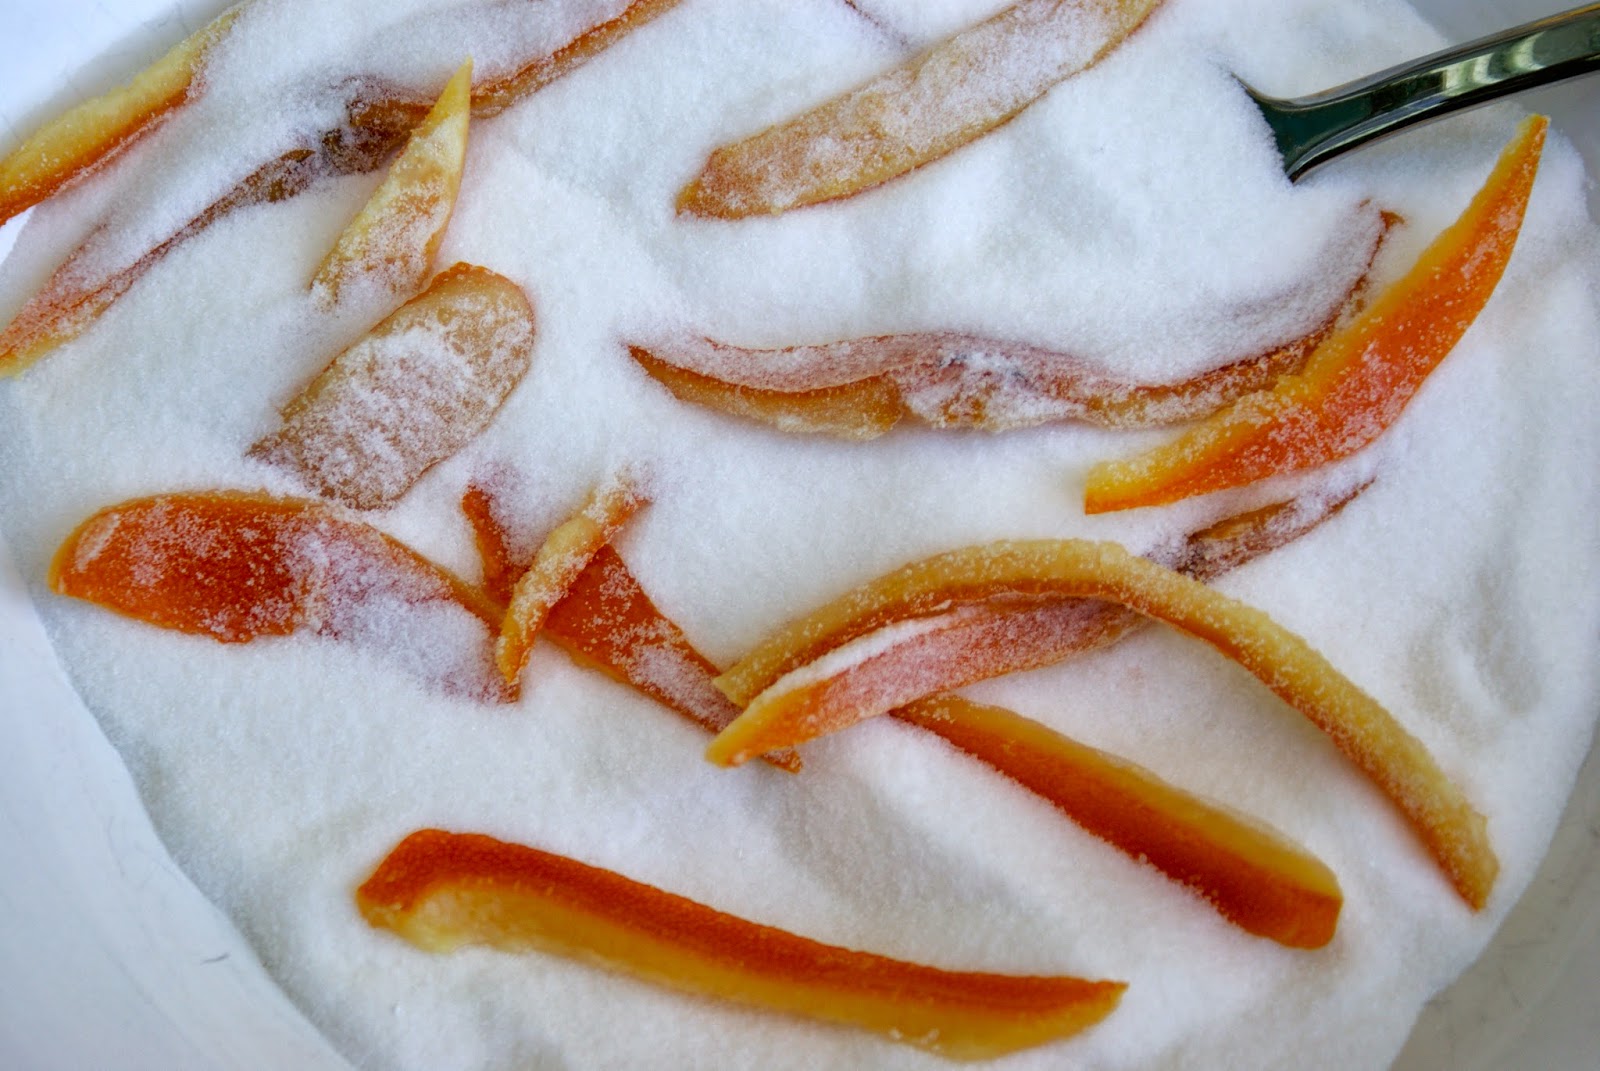

Store the slices in an airtight container and enjoy! So far we have added ours to chocolate poundcake and granola but most have been enjoyed right out of the jar. Save your left-over vanilla scented sugar, it is delicious in poundcake and your morning coffee.


Tuesday, December 17, 2013
An Arctic Winter Birthday

Let's hear it for December Birthdays! My husband and daughter both have them. Making each of their days special while still in the throes of holiday planning can have it challenges but I like to think of it as more reasons to celebrate in an already festive season. This year she turned 8 and asked to spend it with just our family, in an arctic wonderland. The first part was easy, the second took some creativity since we live in Southern California and have been experiencing an unseasonable heatwave this past week.

We had fun filling the ceiling with hanging paper snowflakes and baking a chocolate icebox cake (cute huh?) complete with delicious marshmallow frosting. I found some glittery white foam sticker paper and we created these sweet winter wonderland cake toppers.


When I found these little metal, water resistant capsules though, I knew there had to be a frozen scavenger hunt to go along with the arctic theme. We filled each one with tiny, and I mean tiny, paper scrolls with clues written on them, then placed each capsule in silicone dishes of water to freeze. The idea was for her to find the clues frozen in their ice orbs and wait for it to melt before heading to the next frozen clue. I mentioned the freak heatwave right? To compensate I filled each at different levels, the smaller orbs would be the first clues, melting faster then the last and largest which would ideally stay frozen until we reached the end. They worked beautifully and she has a great time.

We ended the evening with our traditional back yard movie night snuggled under blankets (the heat finally relented) with popcorn and Wallace and Grommit. A good day for all.

Subscribe to:
Posts (Atom)
